Guide to Workflow 1: "Send Message to AI"
Introduction:
Workflow 1, known as "Send Message to AI," is the critical automation that connects GoHighLevel (GHL) with ChatbotsAI through webhooks. This workflow is designed to handle customer replies and ensure the AI responds appropriately, depending on the interaction type. Understanding this workflow is crucial for optimizing your customer engagement processes within GHL.

Workflow Triggers:
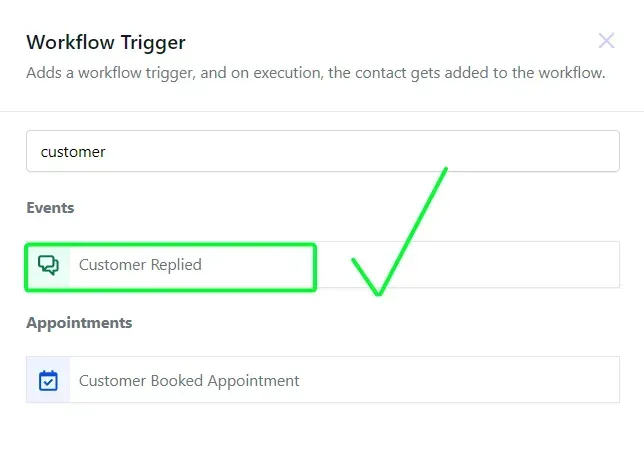
The primary trigger for this workflow is the "Customer Replied" event. This trigger activates when a contact sends a message via one of the supported communication channels:
- SMS
- Instagram (IG)
- Facebook (FB)
- Chat Widget
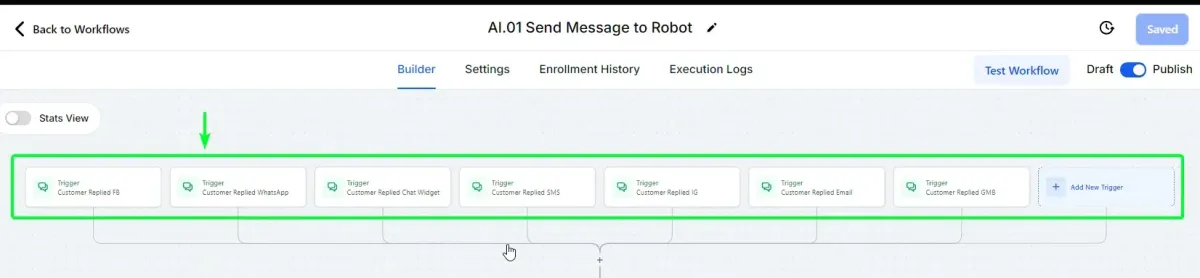
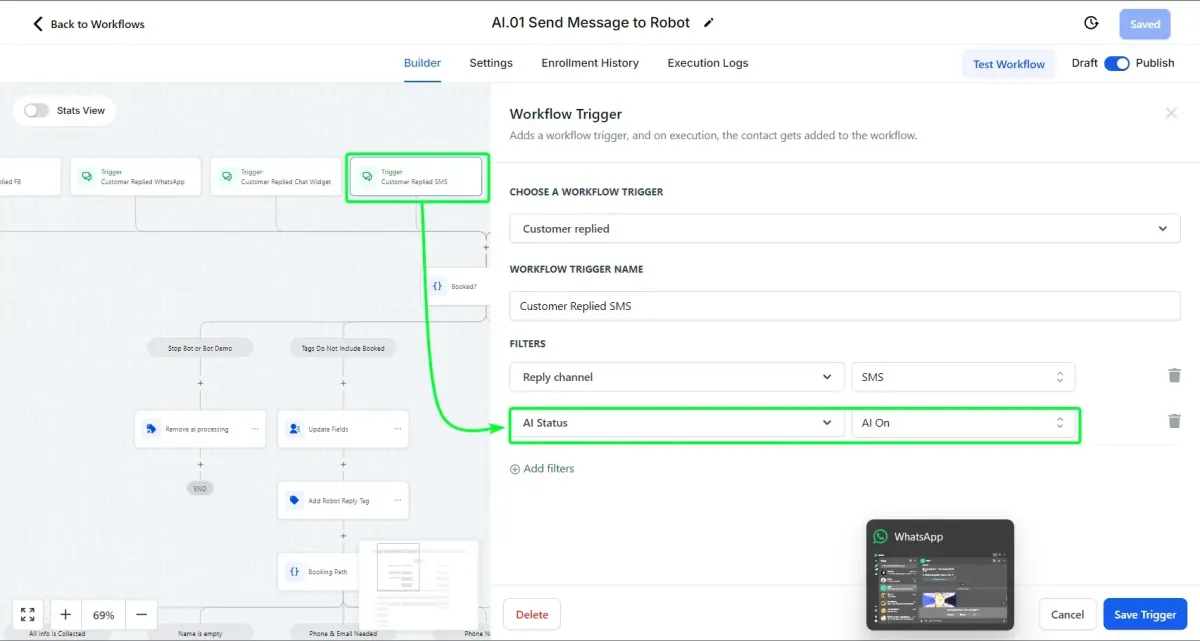
Each communication channel has its own reply channel filter to ensure that only the desired channels trigger this workflow. This setup allows flexibility, enabling users to enable or disable triggers per their preference by simply removing the specific channel triggers they don't wish to use.

Additionally, users can add more filters to this trigger to ensure the workflow only activates under specific conditions. The most common additional filter is the "AI Status" set to "ON." This ensures that the AI will only activate when the AI Status is already set to "ON" in a previous workflow. This filter is particularly useful when you do not want the AI to respond to every incoming message. For example, if you are conducting an outreach campaign and only want the AI to engage after specific actions, this filter helps manage that flow effectively.
Important Note:
The "Customer Replied" trigger is the only one that should be used in this workflow. Introducing other triggers, such as "Form Submitted," can cause issues. If you need the AI to engage after a form submission, create a separate workflow that sends an initial message. The AI will then take over when the contact replies. For more information on setting the initial message correctly, refer to the [Complete Explanation of the Intro Message]
Workflow Pathways:
Once the workflow is triggered, it proceeds to an If-Else Condition that determines the subsequent actions based on the contact’s booking status and the AI's activation status.
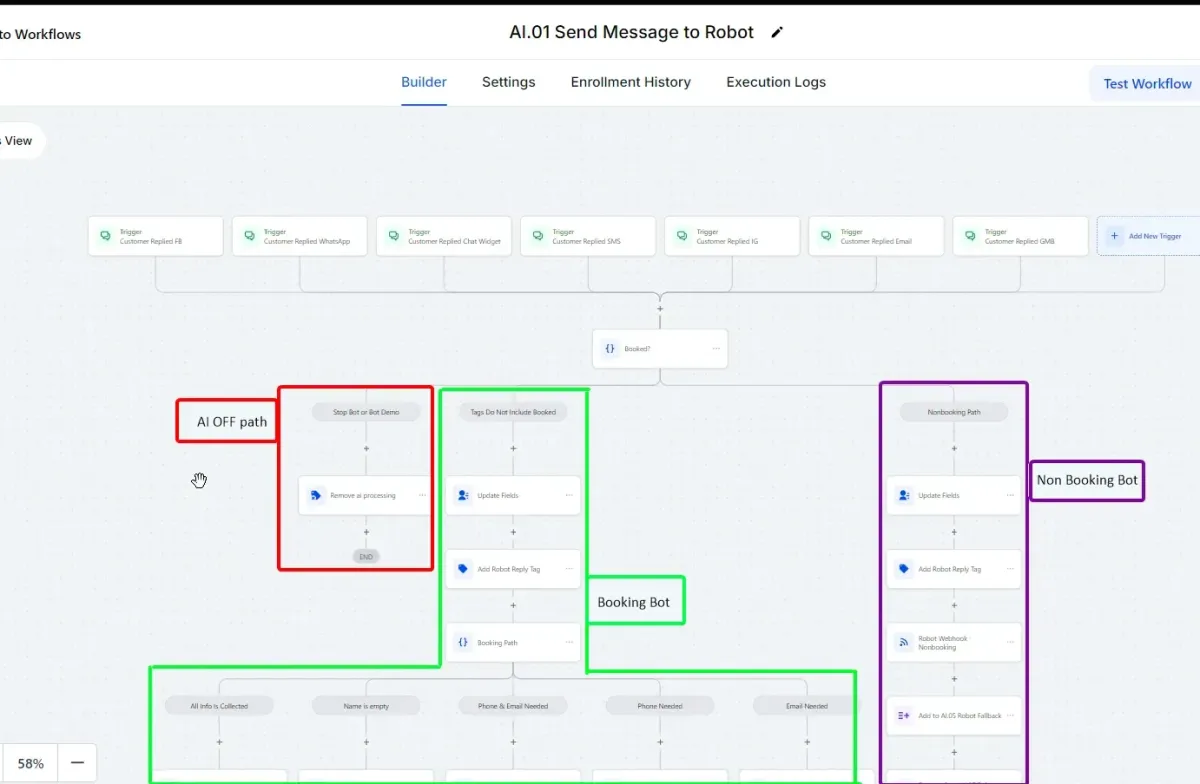
1. Booking Bot Path:
- Condition: This path is activated if the contact has not yet booked a service and the AI status is not set to "OFF." If the AI status is empty, the workflow will automatically turn the AI "ON."
- Action: The workflow will set the Booking Bot Prompt, guiding the AI to engage the customer with booking-related interactions.
2. Non-Booking Bot Path:
- Condition: This path is triggered after the contact has booked a service and replies again, as indicated by the presence of a "booked" tag.
- Action: The workflow sets the Non-Booking Bot Prompt, ensuring the AI handles post-booking interactions appropriately.
If the AI status is set to "OFF," the workflow will default to the "Demo or AI off" path, where no actions are taken, preventing the webhook from being triggered.
Adding Additional Bots:
The flexibility of this workflow allows users to add more bots by modifying the If-Else Condition. You can define additional pathways based on new conditions, guiding the contact to different bots depending on the interaction's context.
For example, you might want to introduce a bot that handles specific customer inquiries or upsells a service after a booking has been confirmed.
To achieve this:
- Define New Conditions: Use the If-Else logic to create conditions that direct the contact to a particular bot based on their status, tags, or other criteria.
- Set Appropriate Tags: Ensure you use clear and distinct tags or custom fields to differentiate between the conditions that will trigger each bot.
- Update Prompts: Depending on the path the contact takes, set the appropriate bot prompt using the "Update Fields" option. This ensures the AI delivers responses tailored to the specific scenario.
By carefully managing these parameters and conditions, you can create a more dynamic and responsive AI system that handles a wide range of customer interactions efficiently.

Error Prevention and Best Practices:
- Avoid Multiple Triggers: Stick to the "Customer Replied" trigger for this workflow. Use separate workflows for other triggers, like form submissions.
- AI Status Management: The AI status should not be set to "OFF" unless you intend to deactivate the AI for specific contacts. If the AI status is empty, the workflow will turn it "ON" automatically. Always ensure AI status is correctly managed to avoid unintended outcomes.
- Execution Logs: To verify the workflow's success, especially the webhook action, you can check the execution logs. This is crucial to confirm that the webhook was successfully triggered. For more detailed error detection and troubleshooting, refer to the [Additional Error Detection in Workflow Execution Logs for ChatbotsAI]
Conclusion:
Workflow 1, "Send Message to AI," is a fundamental component of the ChatbosAI and GHL integration. By correctly setting triggers, managing conditions, and configuring prompts, you can ensure that your AI-driven customer interactions are seamless and effective. For more in-depth information on specific parts of this workflow, refer to the ChatbotsAI Knowledge Base and other relevant guides.
CONNECT
Reach out to us!